What Does It Mean When Your Reli on Prime Read Hi
Too Run into for ReliOn Prime

Related Manuals for ReliOn Prime
Summary of Contents for ReliOn Prime number
- Folio 1 Prime Blood Glucose Monitoring Organization User Instruction Transmission...
- Page 2 Circumspection: Before using any product to exam your blood sugar (claret glucose), read all instructions and do the test. Do all quality control checks equally directed and consult with a diabetes healthcare professional person. These recommendations utilise to all blood glucose monitoring systems and are supported by the American Association of Diabetes Educators, the American Diabetes Association, the U.S.
-
Page 3: Table Of Contents
Important Information ....... . . viii The ReliOn® Prime Organisation ....... . 9 Understanding the ReliOn®... - Page iv Alternate Site Testing (AST) ....... 31 Important Information About AST ..... . . 31 Preparing to Examination Your Blood Glucose From an Alternate Site .
- Page 5 Display Screen Images ........59 Caring For Your ReliOn® Prime Blood Glucose Meter ... 64 Cleaning the Meter .
-
Folio 6: Introduction
E'er consult your diabetes healthcare professional person before making any changes. All of the data needed to use the ReliOn® Prime System is included in this transmission. Please read information technology thoroughly earlier using the arrangement. If y'all have any questions, call Customer Service at 800.631.0076 (24 hours a day, vii days a... -
Page seven: Intended Employ
Intended Use The ReliOn® Prime Blood Glucose Monitoring Organization is intended for the quantitative measurement of glucose in fresh capillary whole claret samples fatigued from the fingertips or palm. Testing is done outside the body ( In Vitro Diagnostic Apply). Information technology is indicated for use at home (over the counter [OTC]) by persons with diabetes, or in clinical settings past healthcare professionals, as an aid to monitor the effectiveness of diabetes control. -
Page 8: Important Information
Important Data • Test results below 70 mg/dL indicate low blood glucose (hypoglycemia) • Test results above 240 mg/dL betoken high claret glucose (hyperglycemia) • If results are below 70 mg/dL or above 240 mg/dL, repeat the test • If results go along to measure below 70 mg/dL or above 240 mg/dL consult your diabetes healthcare professional immediately • If symptoms are non consistent with exam results AND all the instructions have been followed advisedly, contact your diabetes healthcare professional • Before testing, ever make sure both the meter and test strips are at operating temperature... -
Page 9: The Relion® Prime System
THE ReliOn® Prime SYSTEM The ReliOn® Prime Organization Includes: • ReliOn® Prime Meter • Carrying Case • User Pedagogy Transmission • O ther materials required simply not provided: • Test Strips • Control Solution • Lancing Device and/or Lancets... -
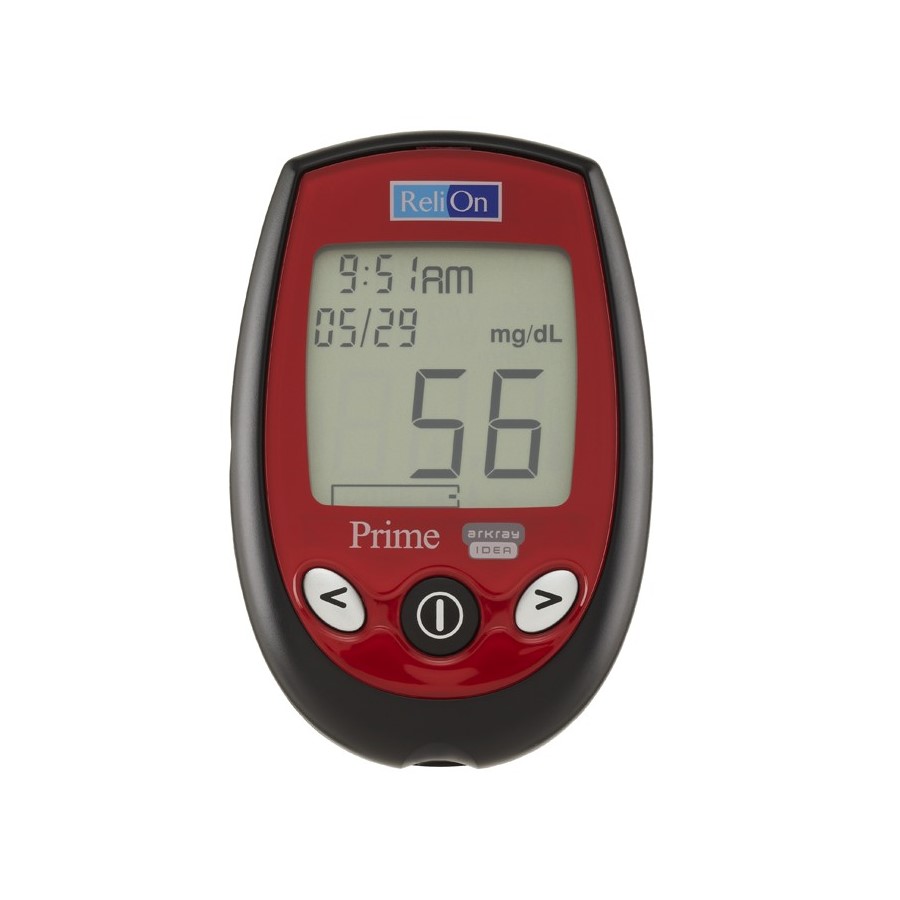
Folio 10: Understanding The Relion® Prime Blood Glucose Meter
UNDERSTANDING THE ReliOn® Prime Claret GLUCOSE METER Back Front Display Screen Data Connection Port Back Button Forward Button On/Off Button Test Strip Port Battery Compartment Comprehend... -
Page 11: Explanation Of The Full Display Screen
Caption of the Total Display Screen Command Solution Test Battery Time Memory Mode Date Unit of Measurement Average Test Reading Fault Code Temperature Issue Warning Warning Main Brandish: Test Countdown Exam Results Insert/Remove Examination Strip Error Codes Test Strip Apply Claret If any role of the display screen is missing when the meter is turned on call Customer Service at 800.631.0076. -
Page 12: Relion® Prime Test Strips
0.5 micro-liter (µl) of blood and provide Contact Bars an end-make full sample application tip for easy claret awarding. The ReliOn® Prime Blood Glucose Monitoring System measures the corporeality of glucose (saccharide) in fresh capillary whole blood. When a drop of blood is added to the sample awarding tip, the sample is drawn into the test strip reaction site. -
Page 13: Testing With Relion® Prime Test Strips
TESTING WITH ReliOn® Prime Test STRIPS The ReliOn® Prime number Blood Glucose Monitoring System works with the ReliOn® Prime Test Strips. Important Exam Strip Data • Store the test strip bottle in a cool, dry identify between 39°F– 86°F (4°C–30°C) • Proceed abroad from direct sunlight and heat • Do not refrigerate or freeze • Do not store or transfer the test strips outside the original canteen • Every bit before long as y'all have removed a test strip, replace the cap securely on the bottle • Apply test strips within xc days (iii months) of opening and not across the expiration date (... -
Page fourteen: Important Test Strip Information
Important Test Strip Data • Write the date of opening on the bottle label to remind you lot to discard the strips after xc days (three months) • Practise non bend, cut, or alter a exam strip • Do non reuse a test strip • Use only ReliOn® Prime Test Strips with the ReliOn® Prime Meter • Ensure your hands are clean and dry before handling test strips... -
Page 15: Changing The Bombardment
Changing the Battery The ReliOn® Prime Blood Glucose Meter has a CR2032 bombardment installed. Annotation: Irresolute the battery should only have a few seconds. If the battery is changed inside 30 seconds, the meter memory is not affected. You will not lose any by test results and the settings are not affected. - Page xvi Alert: Proceed all batteries out of children'due south reach. If a bombardment is swallowed, consult a md immediately. When the bombardment ability is getting low, your meter shows . Yous have enough power for about 100 tests earlier you need to replace the battery. If the is flashing, there is simply enough power for about 20 tests. Replace the battery as soon as possible.
- Page 17 How to Alter the Battery Stride one Turn the meter off. The bombardment cover is on the back of the meter. Stride two Pull the battery embrace upward with your finger or fingernail. Remove bombardment cover. Step 3 Remove the old bombardment. If necessary, turn the meter over and tap it gently against the palm of your hand until the battery falls out.
-
Page xviii: Meter Set
Meter Set Up Before using the ReliOn® Prime Meter for the first fourth dimension, you must set up the time and date. You can choose between the 12-60 minutes format (i-12 o'clock with am or pm) and the Military 24-hour format (0-23). The date format tin can either be displayed equally month/day (U.S.A. format) or twenty-four hour period/month (International format). Practise not perform a blood glucose exam until you lot accept prepare the meter correctly. - Page xix Step 3: Set the time format The time can be displayed in either 24-hour format or 12-hour format with AM and PM. The meter displays the current time format. To change format, printing either the Dorsum or Forward button. Press the On/Off button to select the time format. The date format then appears on the display.
- Page twenty Stride 5: Gear up the hr Press and release the Back or Frontwards button to change the 60 minutes. Hold the Back or Forrad button down to ringlet through quickly. When the correct hr is displayed, printing the On/Off button. The infinitesimal setting then flashes on the display. Step 6: Gear up the minute Hour flashing Printing and release the Dorsum or Forwards button until the correct minute appears.
- Folio 21 Footstep 8: Set the day (If day/month format is selected then Step viii will set calendar month) Press and release the Back or Frontwards button until the right day appears. Hold the Dorsum or Frontward button downwards to whorl through quickly. When the correct solar day is displayed, printing the On/Off push button. The twelvemonth setting then Twenty-four hour period flashing flashes on the display.
-
Folio 22: Claret Glucose Testing
BLOOD GLUCOSE TESTING ReliOn® Lancing Device Release Button Step 1 Charger Pry the depth Depth Lancet adjustment cap Indicator Deep Depth Setting sideways to remove information technology. (Longest Mark) Safety Tab Shallow Depth Setting (Shortest Marker) Clear Cap Medium Depth Setting... - Page 23 Step two Holder Insert a new, unused lancet into the Holder until it stops. Step 3 Twist off the condom tab. Step 4 Attach the depth adjustment cap.
- Page 24 Stride 5 Adjust the depth of puncture setting if necessary. If the obtained corporeality of claret is excessive, plough the dial to a lower setting. If the obtained corporeality of blood is insufficient, plow the dial to a larger setting. Level indications Lancing Device.
-
Folio 25: Obtaining A Drop Of Blood
Obtaining a Drop of Claret Step 1 Wash hands with soap and warm water. Dry out hands thoroughly. If y'all utilise booze wipes to cleanse fingers, make sure the area is dry before lancing finger. Residual booze may lead to inaccurate readings. Footstep 2 Let the arm hang downwards for 10 to xv seconds. - Folio 26 Footstep 5 Prepare aside the Lancing Device and wait a few seconds for a blood drop to form. Keeping the hand warm, lowering the hand to waist level and gently massaging your wrist, palm or the base of the finger helps the flow of claret. Employ a different site each fourth dimension yous exam to help prevent soreness and calluses.
-
Page 27: Performing A Blood Glucose Test
PERFORMING A Blood GLUCOSE Examination Note: For Instructions on Alternate Site Testing, refer to pages 31-38. Step i Insert a ReliOn® Prime number Test Strip into the meter. Insert the contact confined Test Strip Port into the test strip port, with the reaction Contact Bars site facing up. - Page 28 The test strip and flashing blood drop tells you the meter is fix for you lot to employ a drop of blood to the sample application tip at the finish of the test strip. Footstep two Lance your finger using the Lancing Device. Affect the 'Apply Blood' symbol sample application tip at the cease of the strip to the blood flashing...
- Page 29 IMPORTANT: The meter volition start to count downwardly, showing a flashing nuance when it detects that blood has been practical. Discard examination strip if meter does not start to count downward after blood drop is applied. Of import: The minimum sample book is 0.five µL. Smaller samples may non start the meter or can showtime the meter count downwards and provide an "E13" fault message.
- Folio 30 Step 3 E'er record your results in your self-testing logbook forth with other information such as insulin dosage, nutrition, and exercise. The result is automatically stored in memory with the time and appointment. Step 4 A lancet should be used in one case. After use, put protective cap back on and remove lancet from lancing device.
-
Page 31: Alternate Site Testing (Ast)
ALTERNATE SITE TESTING (AST) Important Information Near AST Sites other than your fingertip may accept fewer nerve endings and then obtaining a blood sample from these sites may be less painful. The technique for alternate site testing is unlike from fingertip testing. Claret glucose results from sites other than your fingertip could be significantly dissimilar due to claret glucose levels changing rapidly after a meal, insulin, or exercise. - Page 32 Consider Alternate Site Testing When: • Testing earlier a repast • You are in a fasting state • Two hours take passed since a meal • Two hours have passed since insulin dosing • Two hours accept passed since physical activeness Use Fingertip When Testing: • Within two hours after a repast • Within two hours after insulin dosing • Inside ii hours after physical activeness • If you lot accept a history of hypoglycemia, are experiencing low blood sugar, or suffer from hypoglycemic unawareness (you cannot tell when y'all accept low blood glucose) • To confirm your blood glucose level if your AST outcome is not consistent with how you lot feel • During times of stress or affliction...
-
Page 33: Preparing To Test Your Blood Glucose From An Alternate Site
Enquire your diabetes healthcare professional person about recommended testing procedures before operating machinery or driving a auto, as fingertip testing is commonly the preferred method of testing nether these circumstances. If bruising occurs, you may cull to lance a fingertip instead. Preparing to Exam Your Claret Glucose From an Alternate Site Choose a Site: Select a soft, fleshy surface area on the... -
Page 34: Performing A Claret Glucose Exam From An Alternate Site
Performing a Blood Glucose Exam From an Alternate Site Footstep ane Attach clear cap for Alternate Site Testing to lancing device. Insert lancet and cock lancing device. Step 2 a) Insert a test strip into the meter. Insert contact bars into test strip port with reaction site facing up. - Page 35 b) Expect until strip with flashing claret drop appears. (You now accept two minutes to apply blood drop before meter shuts off). Footstep 3 a) Vigorously rub the selected area for 5 to 10 seconds until information technology starts to feel warm to the impact. b) Firmly agree the cocked lancing device against the make clean skin for 5 to 10 seconds.
- Page 36 Stride iv Choice upward the meter. Touch the end of the examination strip to the blood sample until the reaction site is full. Immediately remove the meter and test strip from the blood drop. Of import • Was the sample a deep red color and complimentary of watery fluid? • Was the drop big plenty (at least 0.five µL)? • Did the reaction site fill with enough claret all at once? IF NOT, Echo Exam.
- Page 37 Pace 5 The meter will count down, showing a flashing dash and brandish result in 7 seconds. CONSIDER YOUR RESULT. REPEAT Alternate SITE TEST: • IF the claret sample appeared to be diluted with clear fluid. • IF you did not vigorously rub the test site. • IF the blood drop was non large enough to fill the reaction site • IF the examination was accidentally marked equally a "Control" result. • IF your effect was non consistent with how you feel. Whatsoever of the higher up situations tin can lead to an inaccurate test result. Not Enough Plenty...
- Page 38 If the repeated alternate site outcome is notwithstanding not consistent with how you feel, ostend your blood glucose level with fingertip testing. Step 6 Always record your results in your self-testing log volume along with other data such as insulin dosage, diet, and practice. The result is automatically stored in memory with the time and date.
-
Page 39: Using Command Solution
It is important that you lot carry out this unproblematic check regularly. Command Solution contains a known amount of glucose that reacts with the ReliOn® Prime Examination Strip. Control Solutions are available in ii levels - Normal and High. Compare the control solution test results with the range printed on the test strip bottle label. To lodge command solution, call ReliOn® at 800.631.0076. -
Page 40: Recommended Use Of Control Solution
It is recommended to utilise Control Solution: • When you lot open a new bottle of exam strips. • Whenever you suspect the meter or test strips may not be functioning properly. • If test results appear to be abnormally high or low or are not consistent with clinical symptoms. • If the test strip bottle has been left open or has been exposed to calorie-free, temperatures beneath 39°F(four°C) or above 86°F(thirty°C), or humidity levels above 80%. • To bank check your technique. • When the ReliOn® Prime Meter has been dropped or stored beneath freezing or above 122°F(50°C). • Each fourth dimension the batteries are changed. -
Page 41: Performing A Control Solution Test
Performing a Command Solution Test Before performing a control solution test, ever bank check the expiration appointment ) of the command solution. Do not use command solution if information technology is past the expiration date or if the solution has not been stored correctly. When you open a new bottle of control solution, always write the date of opening on the command solution label. - Page 42 Footstep 1 Insert a ReliOn® Prime Test Strip into the test strip port of the meter with contact bars facing up. The meter turns on automatically. The full screen appears briefly. If any role of the brandish screen is missing (run into folio 11), phone call Customer Service.
- Page 43 Step two You lot must press the Back or Forward push button BEFORE performing control solution test. Hold the Back or Forward button until appears in the upper right corner of the screen. Verify that remains displayed on the screen. If you do not practise this, the control solution result will NOT exist valid.
- Page 44 Step four Bring meter and test strip to the drib. Test strip volition draw upward the solution. The meter will show result in seven seconds. Note: Dye added to control solution may stain surfaces or fabric. Use with care. 06146A 2010-ten Control Solution Range (mg/dL) (Rango de la solución de control)
-
Folio 45: Comparing Control Solution Results
Comparing Control Solution Results If the issue is outside the range printed on the test strip bottle, repeat the test. 1 or more than of the following may accept caused an out-of-range upshot: • The meter was non placed in control solution mode earlier calculation control solution • The command solution has expired or has been contaminated • The control solution was stored below 35°F (2°C) or higher up 86°F (30°C) • First drop of control solution was not discarded • The examination strip was not stored correctly • The examination strip was used after the expiration appointment of the bottle • The test strip bottle was open for more than 90 days (3 months) • The ReliOn® Prime meter has been damaged or has malfunctioned • Contagion due to the tip of the command solution bottle touching the examination strip... -
Page 46: Downloading Exam Results To A Computer
Repeat the exam, carefully following instructions, using command solution style with new control solution or a new exam strip, every bit advisable. Compare the result with the range printed on the test strip canteen you are using. Note: If your control solution result continues to autumn exterior the required range, the organization may non exist working correctly. Practice NOT USE the organisation to test your claret. -
Folio 47: Understanding Test Results
Agreement Test RESULTS Annotation: The ReliOn® Prime Meter is designed to give results at temperatures between 41°F - 113°F (5°C - 45°C) and relative humidity (non-condensing) of 20–80%. Comparing Meter and Laboratory Results Your ReliOn® Prime Blood Glucose Meter is referenced to fresh plasma blood measurement. This was performed in a clinical laboratory with glucose standard calibration to the NIST (National Institute of Science and Technology, Gaithersburg, MD, Usa). - Page 48 Before You Compare Perform a control solution test to make certain your meter and test strips are working correctly. Look at least ii hours after a meal or drink (other than water) earlier doing comparison claret tests. Fasting is essential if venous blood is required for the reference analyzer.
- Page 49 You may however experience a difference from the laboratory result considering blood glucose levels can alter over short periods. This can be for a multifariousness of reasons, such as food, practice, medication, hematocrit, stress, or loss of body fluids. Data analysis should be performed using a clinically adequate method. Circulating blood glucose fluctuates naturally over time.
-
Folio l: Expected Blood Glucose Readings
Expected Blood Glucose Readings Expected blood glucose levels for people without diabetes: 1, two mg/dL Fasting 70-110 mg/dL two hours subsequently meals 70-140 mg/dL High Blood Glucose Readings If your blood glucose is above 600 mg/dL, you lot volition receive a "Howdy." Echo the test with a new test strip. If this message shows again, contact your healthcare professional immediately! Contact your doctor for advice if examination results are very loftier (in a higher place 240 mg/dL) and/or you have symptoms of loftier blood glucose. These symptoms... -
Page 51: Depression Blood Glucose Readings
Low Blood Glucose Readings If your blood glucose is beneath 20 mg/dL, yous volition receive a "Lo." Repeat the examination with a new exam strip. If this message shows again, contact your healthcare professional immediately! Contact your doctor for advice if test results are very low (below 70 mg/ dL) and/or yous have symptoms of low claret glucose. Symptoms of depression blood glucose include sweating, shakiness, trembling, blurred vision, hunger, headache, confusion, rapid heartbeat, or tingling or numbness around the mouth or fingertips. - Page 52 What This Means for You Frequent blood glucose testing is the best means yous have for keeping track of how well you lot are doing with the factors that affect your diabetes-medication, diet, exercise, and stress management. Blood glucose test results can likewise tell you whether your diabetes is irresolute in ways that might require an adjustment to your treatment plan.
-
Page 53: Recommendations For Better Diabetes Control
Recommendations for better diabetes control • Follow the advice of your healthcare professional. • Follow the practice and repast plans recommended by your healthcare professional. • Accept insulin or diabetes medication at your scheduled times. • Go along in touch with your emotional and physical condition. • Stress or disease can affect diabetes. • Picket for symptoms of hypoglycemia (low blood glucose) and hyperglycemia (high blood glucose). • Always tape your test results in a logbook. A logbook assists you in keeping a tape of your blood glucose results, forth with information on your food intake, exercise, and medication. • Review your logbook of examination results with your healthcare professional person regularly. -
Page 54: Meter Retentivity
METER MEMORY Marking Results in the Memory Y'all tin mark results in the meter memory in two means. Marker Control Solution Tests You lot must mark results with the control canteen symbol . Insert exam strip into the meter. Hold the Back or Forward push until appears in the upper right corner of the screen. -
Folio 55: Marking Other Results
Marker Other Results Y'all can also mark results with an when you do Not want to include the result in your 14- and 30-twenty-four hour period average. For case, if someone else used your meter, or if you believe the test upshot is wrong because you lot applied blood to the test strip incorrectly, use the exclamation mark to ensure that your 14- and xxx-24-hour interval average includes merely those results from testing your ain blood that you want included in your boilerplate. - Page 56 Step two Press the Back or Frontwards push button to display the average of tests over the concluding 14 days. This can include i to 250 results, depending on how frequently you test. The number at the top (20n) shows the number of tests that have produced the average.
- Folio 57 If a examination has not been performed in the last 14 days the meter will display the 14-day average screen with 3 confined. This means there are no results stored to produce the average. If a examination has not been performed in the last 30 days the meter will brandish the 30-day boilerplate screen with 3 bars.
- Folio 58 Results marked with when the test was performed are not included in the average. The marked results tin can be seen when yous roll through the results saved in the memory. The memory mode likewise displays if the outcome was marked earlier using control solution.
-
Page 59: Display Screen Images
Brandish SCREEN MESSAGES A listing of all display screen messages is included below. If you lot have whatsoever questions after reading these messages, or if the meter displays a bulletin non listed hither, call Customer Service at 800.631.0076 (24 hours a day, 7 days a week). If the brandish screen shows , yous should be able to clear the error message yourself. - Folio 60 The bombardment has been replaced. Bank check that the time and date are set correctly. A used strip has been inserted or the meter is having difficulty reading the strip. Echo the test with a new test strip. The battery power is getting low. In that location is enough power for approximately 100 tests before the battery needs to be replaced.
- Folio 61 The bombardment power is depression. At that place is but enough power for about 20 more tests. Supersede with a new CR2032 bombardment every bit before long equally possible. The bombardment power is likewise low for testing. Replace with a new CR2032 battery.
- Folio 62 Thermometer flashing. The meter and test strips are outside the optimum temperature range of fifty°F - 104°F (ten°C - 40°C). Make sure your meter and strips are in an surroundings with a temperature between l°F - 104°F (x°C - xl°C). Treat examination event obtained where the thermometer is flashing with caution. The flashing thermometer volition be displayed on all screens during glucose testing until the meter has reached acceptable temperature.
- Page 63 Corrupted memory. Phone call Client Service at 800.631.0076. Non enough blood was added to examination strip. Retest with new examination strip. Employ at least 0.5µL of blood to sample application tip.
-
Folio 64: Caring For Your Relion® Prime number Claret Glucose Meter
Storage The ReliOn® Prime number Blood Glucose Meter is designed to be stored within a 32°F - 122°F (0°C - 50°C) temperature range. • Do not leave your meter in extremely hot or cold places such every bit near a heat source (radiator) or in a car in very hot or cold weather • Do not store or employ your meter or test strips where they may be exposed... - Page 65 • Never hold the meter or test strips under running water • Practice not use or store your meter on or virtually a strong electro-magnetic field such as a microwave oven, stereo amplifiers, or a mobile phone • Do non shop your meter or test strips about bleach or cleaners that comprise bleach...
-
Page 66: Specifications
SPECIFICATIONS TEST STRIPS: ReliOn® Prime RESULT RANGE: 20 TO 600 Mg/DL CALIBRATION: PLASMA REFERENCED SAMPLE SIzE: MINIMUM 0.v micro-liter (µL) Claret SOURCE: CAPILLARY WHOLE Blood HEMATOCRIT RANGE: 33%-52% Test TIME: 7 SECONDS GLUCOSE UNITS: Mg/DL BIOSENSOR, gLUCOSE OxIDASE ( ASPERgILLUS NIgER SOURCED) Assay METHOD: POWER SOURCE: Unmarried REPLACEMENT 3V (CR2032) Battery BATTERY LIFE: More THAN 2,000 TESTS AT 4 TESTS PER DAY Brandish TYPE:... -
Page 67: Warnings, Precautions, And Limitations
WARNINGS, PRECAUTIONS, AND LIMITATIONS • The ReliOn® Prime Claret glucose Monitoring System is not designed to substitute for pathology laboratory equipment and should not exist used for the diagnosis of diabetes. • Severe dehydration (excessive water loss) may cause false low results. If you believe you are suffering from dehydration, consult your healthcare professional immediately. • A red claret cell count (hematocrit) that is very high (above 52%) can give abnormally depression results. A very low hematocrit level (below 33%) can give abnormally high results. - Page 68 • Practice not use the ReliOn® Prime system at altitudes in backlog of x,000 ft (3,048 m). • Triglycerides up to 3,300 mg/dL practice not significantly affect exam results. However, glucose values in specimens beyond this triglycerides level should be interpreted with caution. • Metabolites of icodextrin (maltose, maltotriose, and maltotetraose) do not bear upon test results. • Use only fresh capillary blood. Do not employ serum or plasma or venous whole blood. IMPORTANT: Low or high claret glucose readings can indicate a potentially serious medical condition. If your blood glucose reading is unusually low or loftier, or you do not feel the way your readings point, repeat the test using a new strip. If your effect is still not consistent with your symptoms or if your blood glucose result is less than lx mg/dL or higher than 240 mg/dL, contact your diabetes healthcare professional for advice.
-
Folio 69: Warranty
WARRANTY You lot are a valued ReliOn® customer of. It is important to u.s.a. that you are completely satisfied with your Claret Glucose Meter. ReliOn® warrants that your Meter will exist gratis from defects in materials and workmanship for a period of v years from the date of the original buy. - Page seventy RETURNS Yous must contact Customer Service at 800.631.0076 before returning your meter. Yous will be instructed how to return the meter to ARKRAY. Returned meters without this authorization will not be accepted. P/Due north 7957-00 ©2011 ARKRAY, Inc. Rev 11/11...
Source: https://www.manualslib.com/manual/704142/Relion-Prime.html
0 Response to "What Does It Mean When Your Reli on Prime Read Hi"
Publicar un comentario